
Structure
Structure in FASTR refers to the organizational hierarchy of your health system - the administrative boundaries that define where services are delivered, and the facilities that deliver them. Setting this up correctly is one of the first tasks when configuring a new instance, because most other features depend on it.
Administrative areas
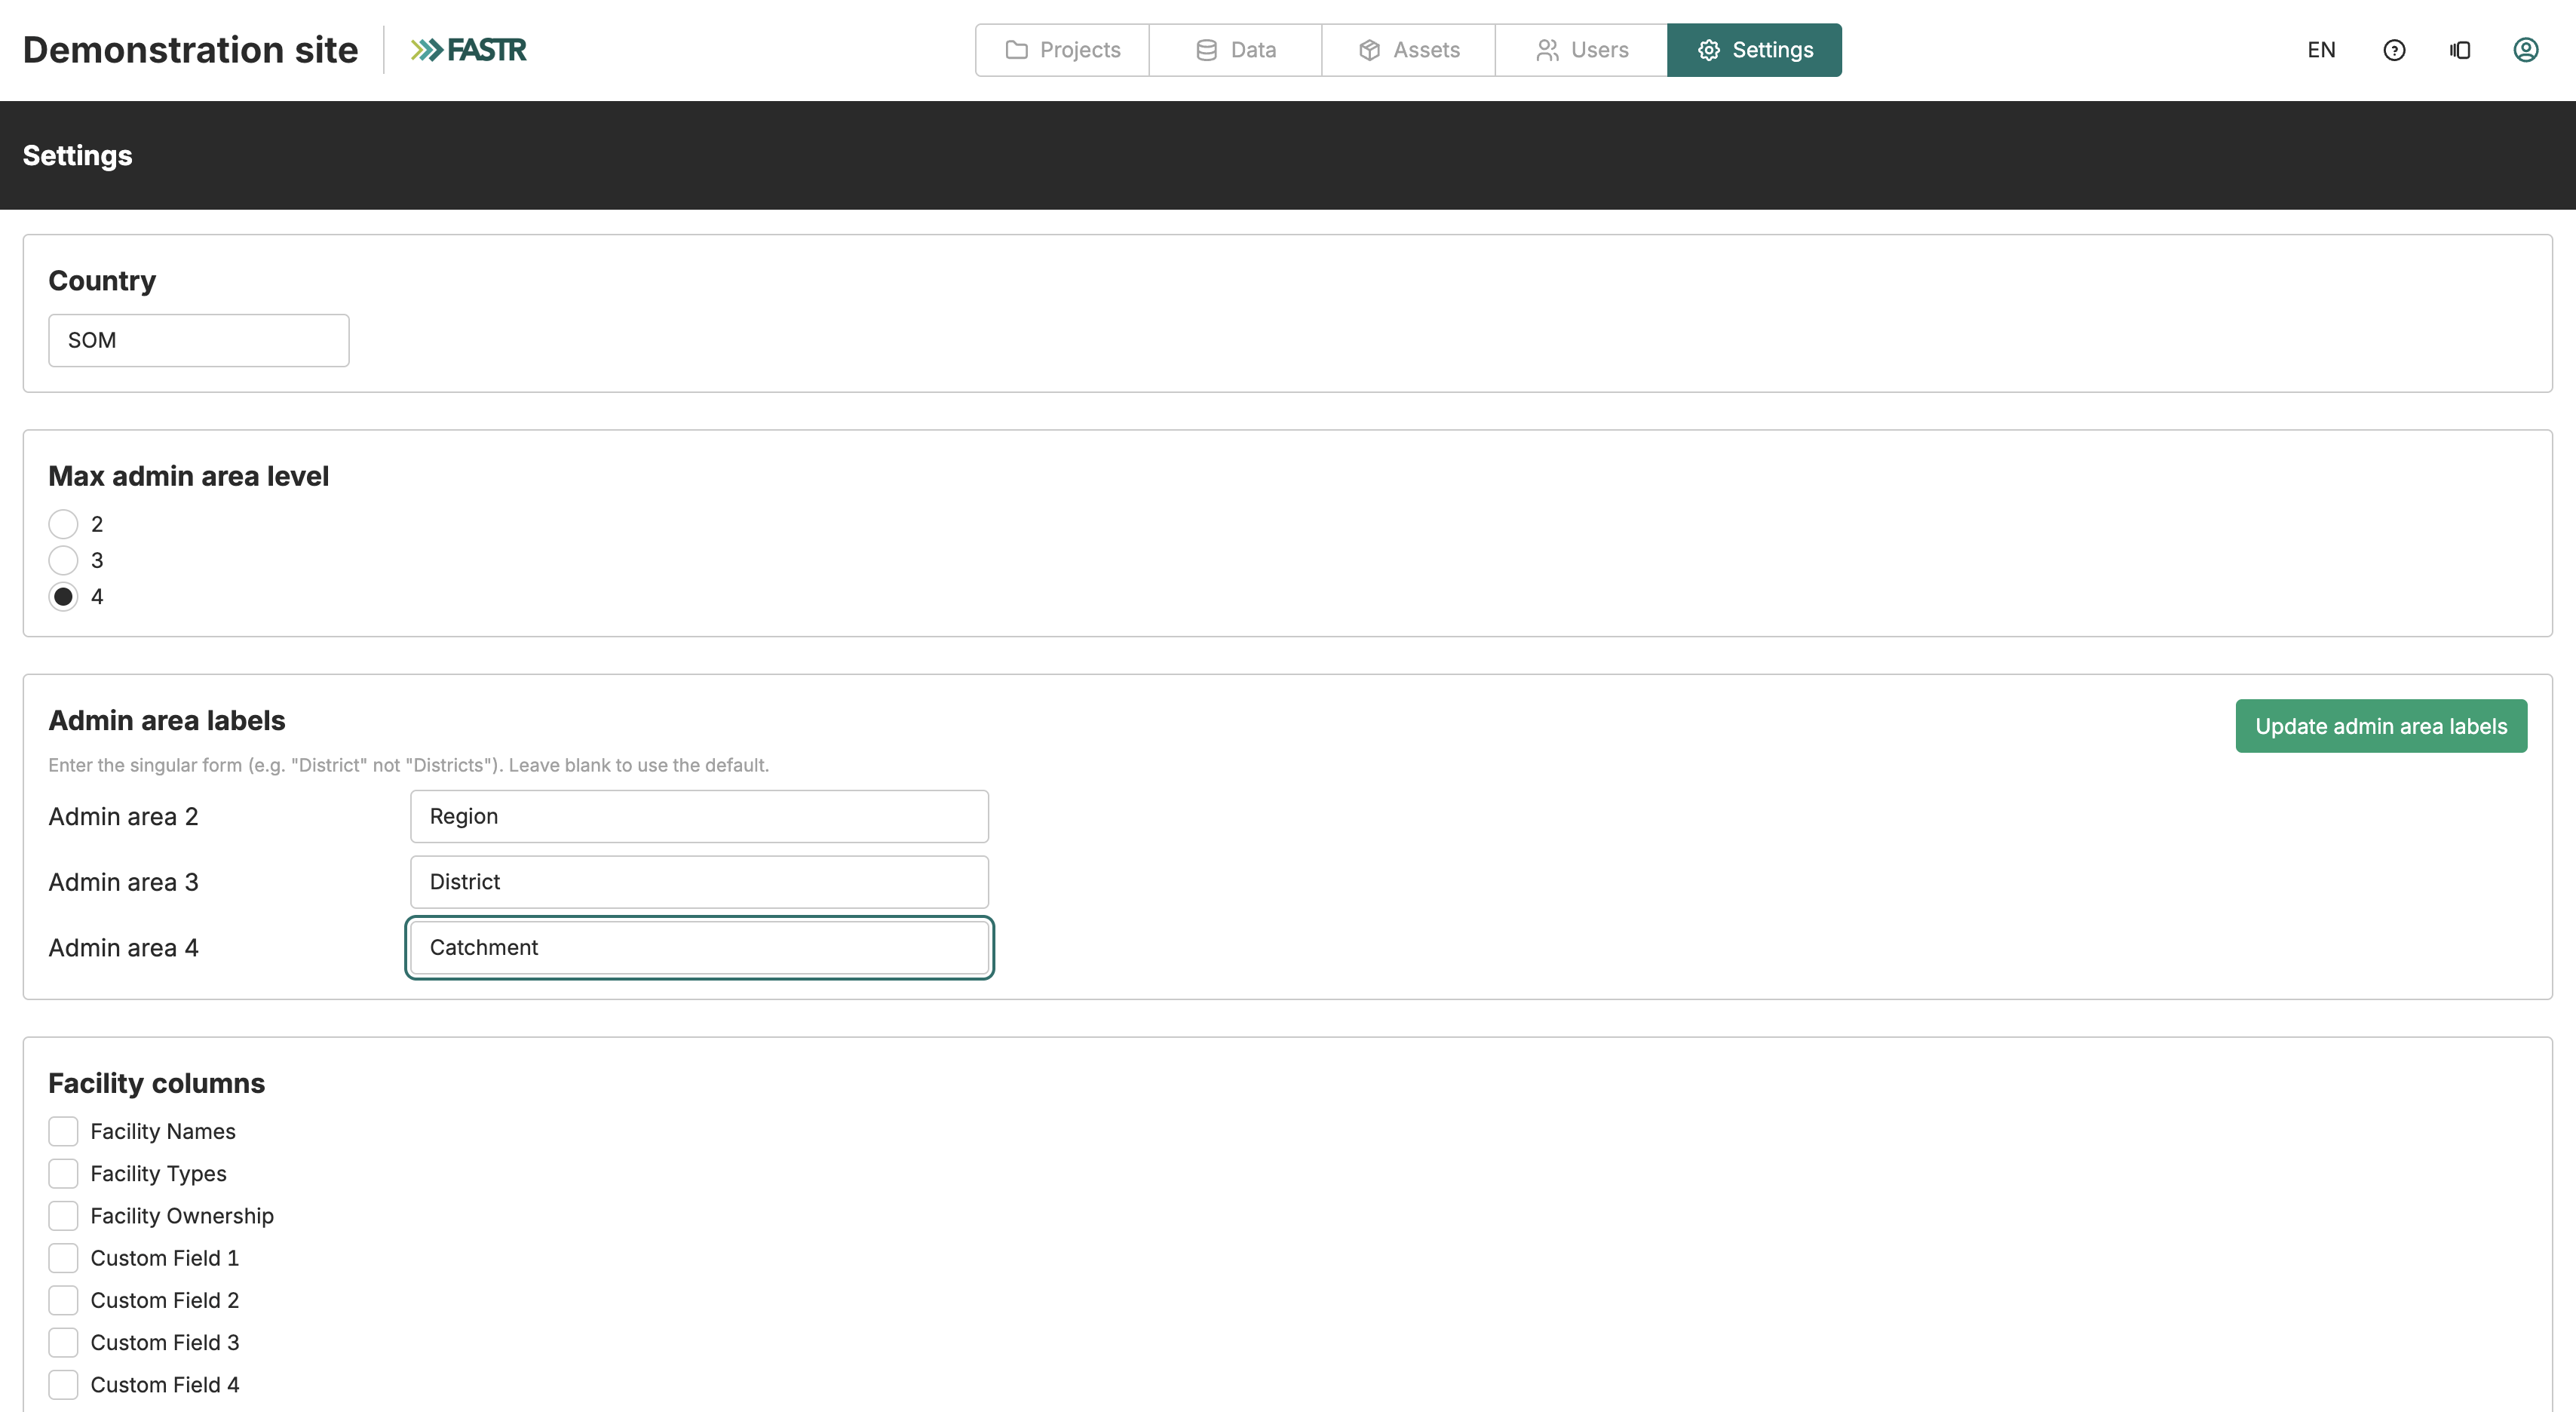
Section titled “Administrative areas”Administrative areas represent geographic boundaries organized in a hierarchy. FASTR supports up to four levels, though most countries use two or three. The exact meaning of each level depends on your country - what FASTR calls “Admin Area 2” might be a region in one country and a province in another. You can customize labels for each level from the Admin area labels card in the Data section.
A typical hierarchy: Admin Area 1 represents the entire country, Admin Area 2 contains regions or provinces, Admin Area 3 contains districts, and Admin Area 4 (if used) contains sub-districts. Each facility links to one admin area at the lowest level you’re using, and FASTR automatically rolls up data to higher levels.
Admin areas are derived from the facility rows — each facility carries its admin area path, and FASTR creates and removes admin areas automatically as you import and delete facilities. You do not manage admin areas directly. A count of admin areas at each level is shown on the HMIS and HFA facility cards after importing.
Health facilities
Section titled “Health facilities”FASTR maintains two separate facility registries: one for HMIS facilities and one for HFA facilities. Both registries share the same admin area hierarchy, but each has its own import flow, its own table of facility records, and its own configuration for admin area depth and facility columns.
Facilities can have optional attributes: facility type (hospital, health center, dispensary), ownership category (public, private, faith-based), and up to five custom attributes for additional categorization.
These attributes enable disaggregation in visualizations. If you want to compare performance between public and private facilities, you need those attributes populated in your structure data.
Registry configuration
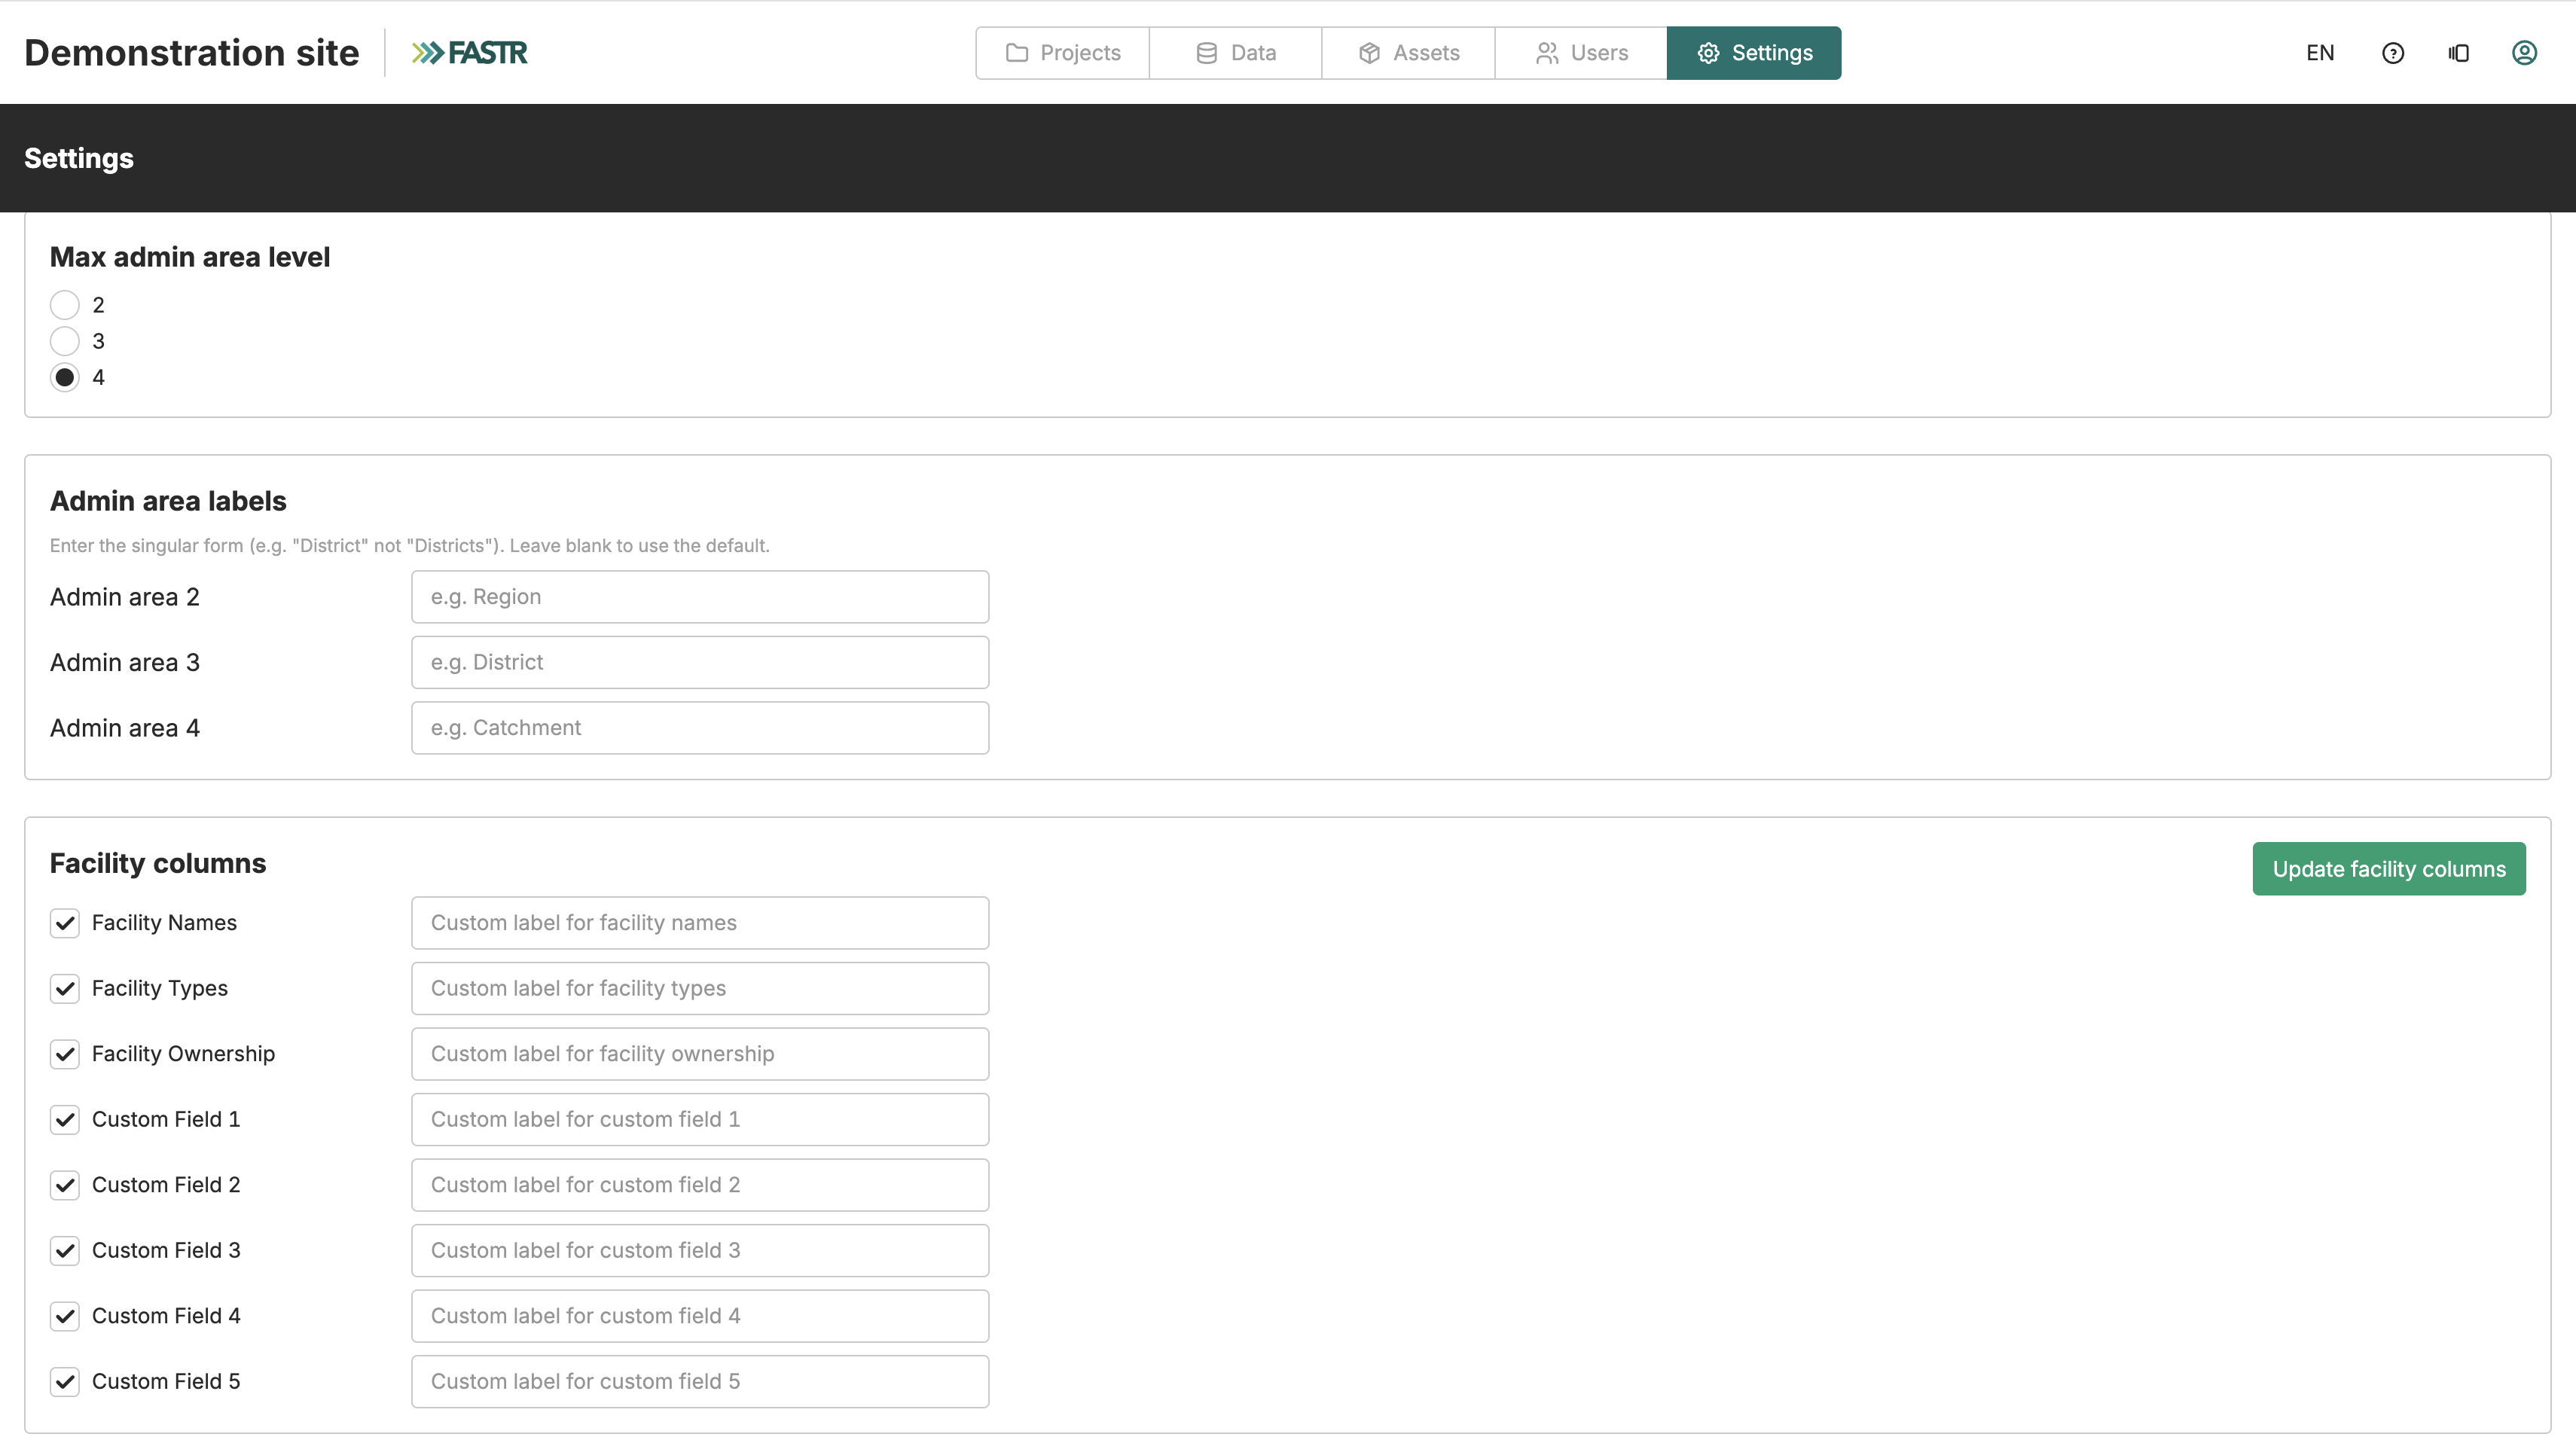
Section titled “Registry configuration”Each registry (HMIS and HFA) has its own configuration card accessible from the Data page. Open the HMIS configuration or HFA configuration card to adjust two independent settings.
Max admin area level sets how many administrative levels this registry’s facilities are organised into. The options are 2, 3, or 4. Changing this setting requires deleting all of that registry’s facilities first — the server enforces this to prevent mismatched data.
Facility columns controls which optional columns this registry’s facility imports carry, and the label shown for each. The available columns are Facility Names, Facility Types, Facility Ownership, and up to five Custom Fields. Enable a column and optionally enter a custom label; leave the label blank to use the default. The two saves — admin level and facility columns — are independent, so a column change never trips the depth guard.
Admin area labels
Section titled “Admin area labels”Admin area level names such as “Region” or “District” are shared by both registries. Set them from the Admin area labels card in the Data section. Enter the singular form of the name for each level in use. Leave a level blank to use the default. These labels appear everywhere data is disaggregated by area.
Importing facilities
Section titled “Importing facilities”To import facilities, navigate to the Data section and open either the HMIS Facilities card or the HFA Facilities card depending on which registry you want to update. Each registry has its own import wizard. Each registry’s import is independent - you can run an HMIS import and an HFA import at the same time.
CSV import
Section titled “CSV import”The CSV import follows a multi-step wizard.
Step 0 - Choose source. Select CSV as your import method.
Step 1 - Upload file. Upload a CSV file with one row per facility. For HFA facilities, you can also upload an ODK questionnaire file (XLSForm) at this step. If your facility columns contain ODK select_one codes, providing the questionnaire causes those codes to be replaced with their labels during import. The XLSForm upload option is not shown for HMIS facility imports.
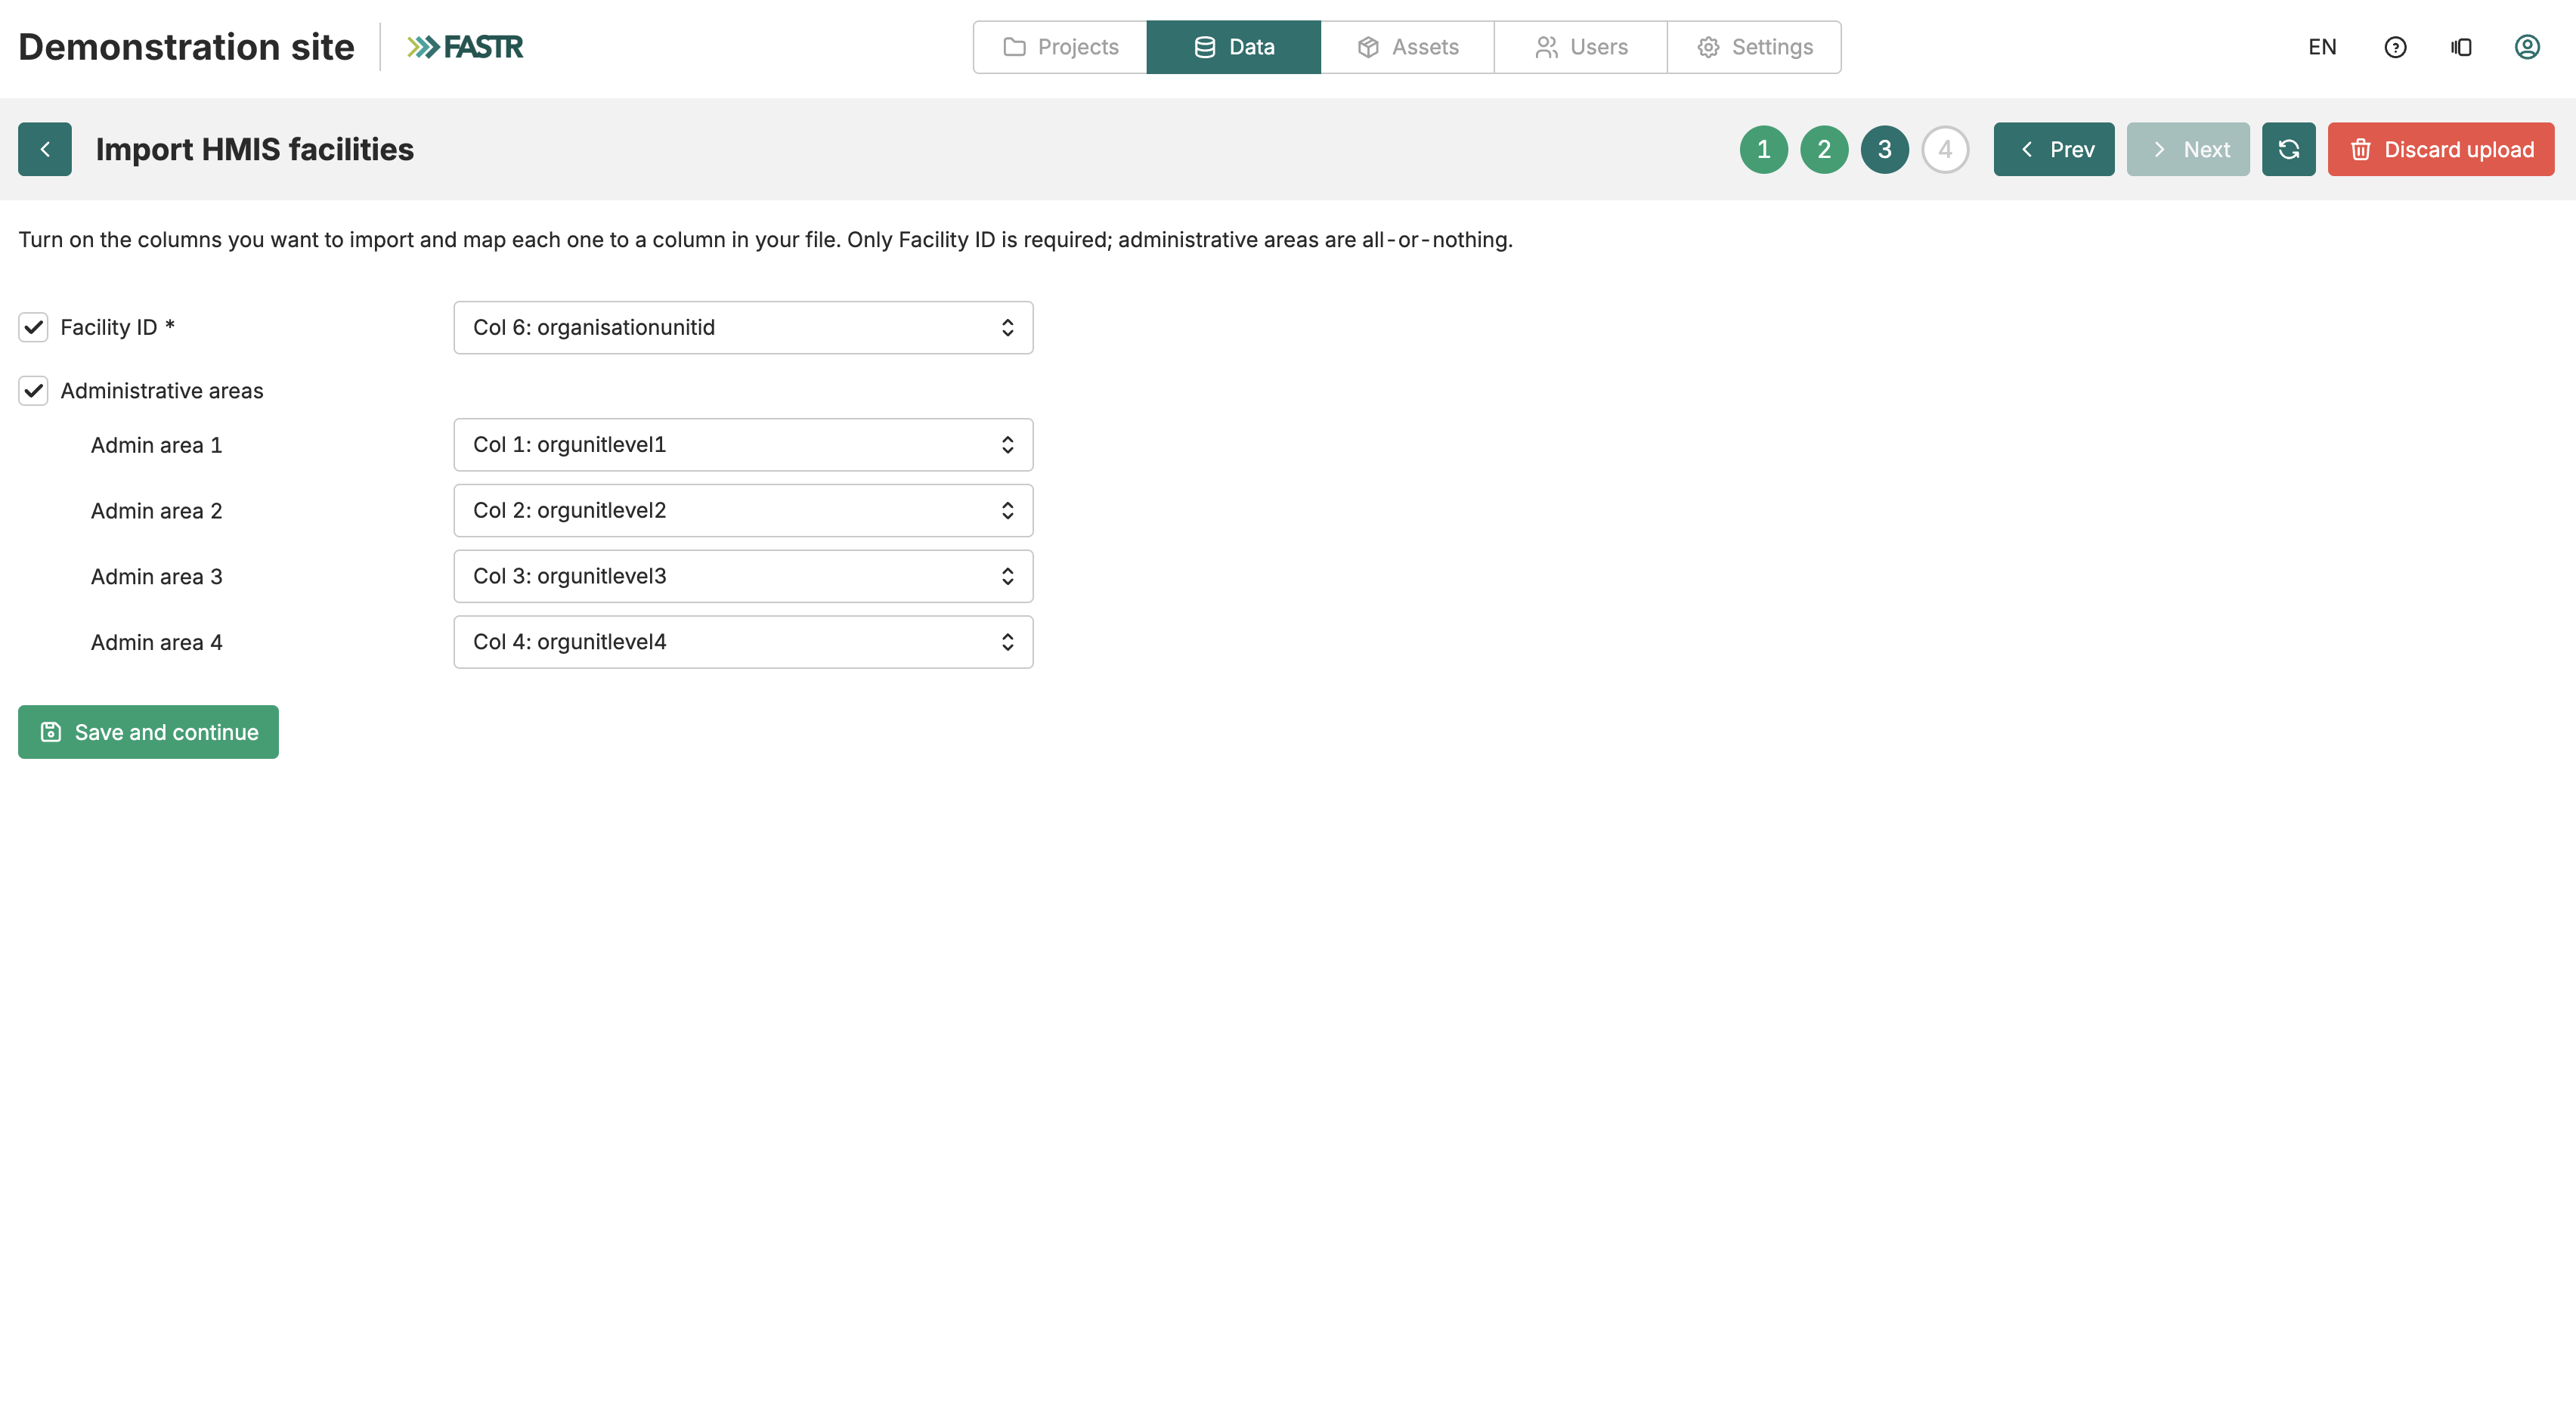
Step 2 - Map columns. Turn on the columns you want to import and map each one to a column in your file. Only the Facility ID column is required. Administrative areas are all-or-nothing: either map all levels or none. Optional metadata columns (name, type, ownership, custom fields) can each be toggled on or off independently. If you are only updating metadata and not moving facilities geographically, you can leave administrative areas turned off.
Step 3 - Stage data. FASTR validates the file and streams rows into a staging table. Progress updates automatically. If the import is running as a background job, the wizard shows a live progress screen that updates automatically until the import finishes. It is safe to leave and return to this screen.
Step 4 - Review values (CSV sources only). If the staged data contains columns whose values can be reassigned before import — such as facility type or ownership — a review step appears. Check which values need reassigning, select affected facilities in the table, and use the Assign to dropdown to map them to a target value. You can also add new category values by typing them in the New category field. For CSV imports, you can show additional columns from your file alongside the assignment table to help identify facilities — up to five context columns can be selected. This step is optional — if nothing needs reassigning, click Continue to import. When you are done, click Save and continue to record your reassignments.
Step 5 - Review and integrate. The staging summary shows how many facilities are in your file and how many of those already exist in the registry. If you provided an ODK questionnaire at step 1 (HFA imports only), the summary also shows which columns had ODK codes replaced with labels, how many values were resolved, and any codes that could not be matched to the questionnaire. If you saved value reassignments in the previous step, the summary shows how many facilities will be recoded per column. Choose an integration mode:
- Replace all existing facilities - deletes every facility currently in this registry, then adds all facilities from your file. This requires administrative areas to be mapped. FASTR blocks this mode if any dataset or sampling weights still reference the existing facilities.
- Add new facilities and update existing ones - adds facilities with new IDs and updates existing ones with the columns you mapped. This also requires administrative areas.
- Update existing facilities only - updates only facilities already in the registry; the import is rejected if your file contains any ID not already present.
Before confirming, the summary shows how many existing facilities match IDs in your file and how many are new. If none match and you expected updates, the facility ID column is probably mapped to the wrong column, or you are importing into the wrong registry (HMIS vs HFA).
After a successful integration, if any previously uploaded GeoJSON map boundaries no longer match an admin area - for example because an import renamed areas - the summary displays a warning naming which registry’s maps are affected. Repair those mismatches in the GeoJSON editor.
DHIS2 import
Section titled “DHIS2 import”DHIS2 import is available for HMIS facilities. The import uses the instance’s stored DHIS2 connection - the same connection managed from the DHIS2 connection card in the HMIS section of the Data page. If no stored connection exists, set one up there before starting a DHIS2 structure import. Once a stored connection is confirmed, select which org unit levels to import. FASTR maps DHIS2 levels to admin area levels. HFA facilities can only be imported from CSV.
Note that DHIS2 credentials are stored securely on the server — once saved, the password is not sent back to the browser.
Managing existing facilities
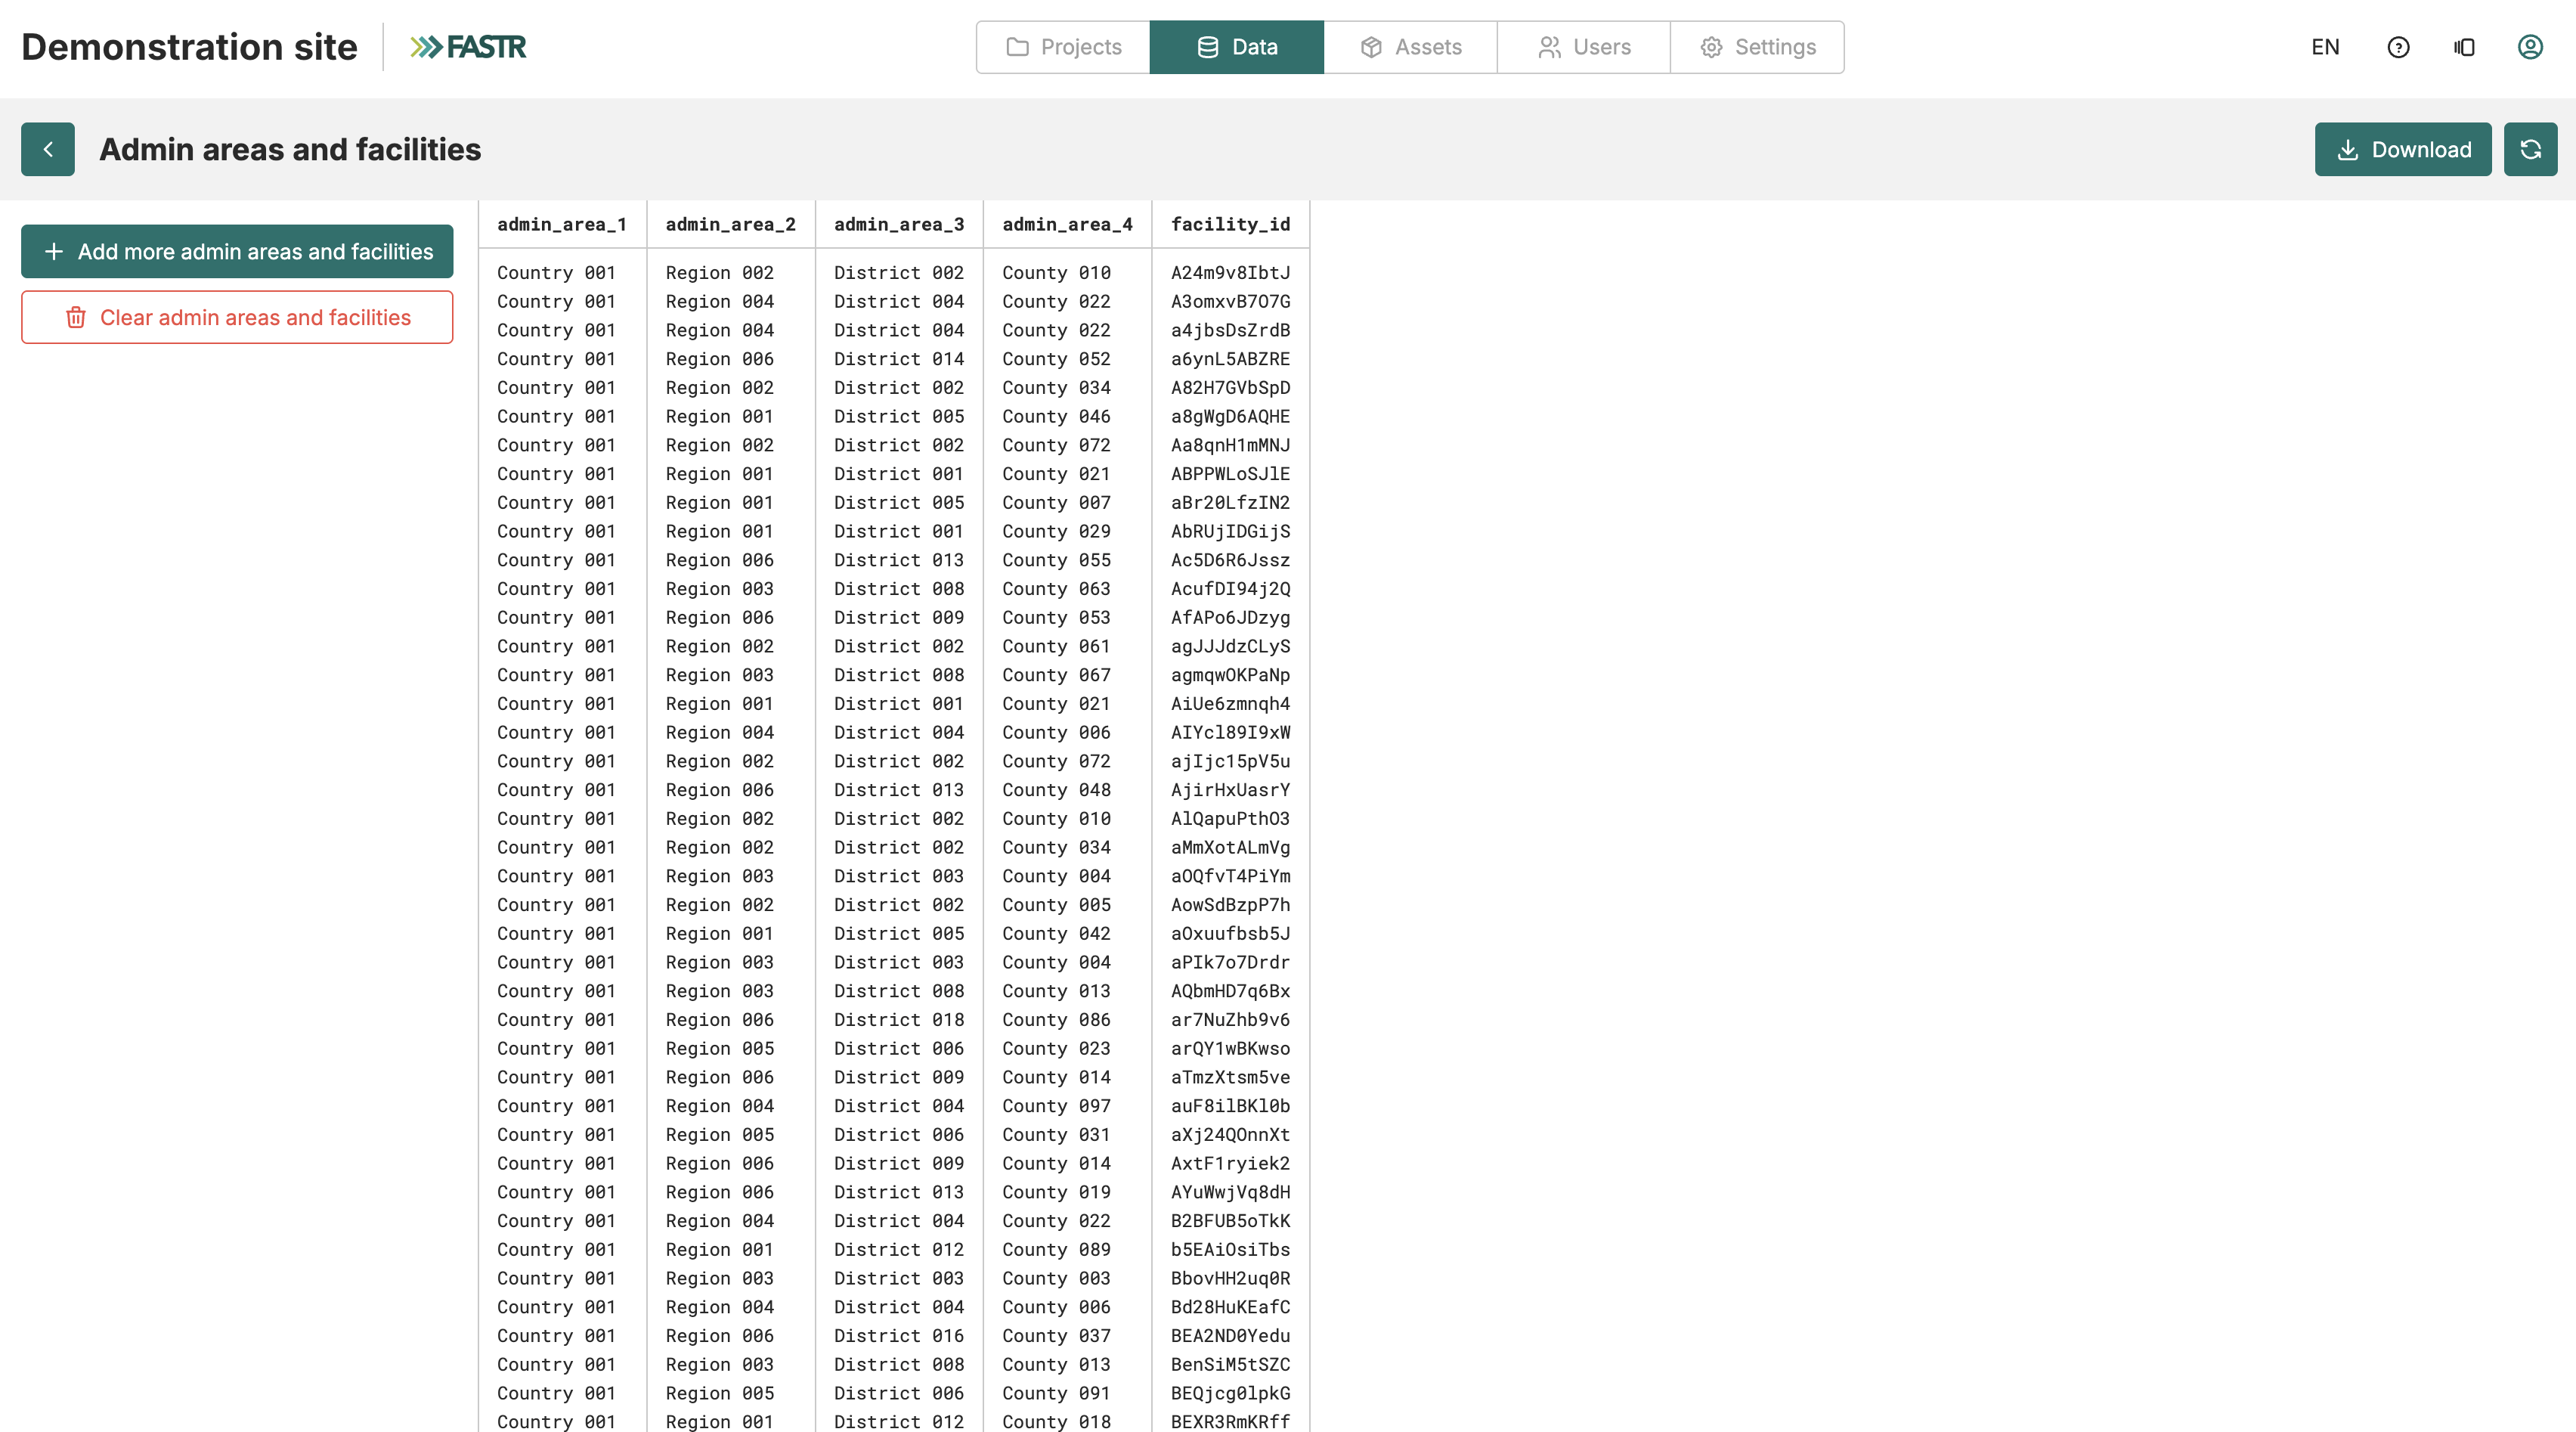
Section titled “Managing existing facilities”Once imported, facilities appear as a searchable table showing all records with their admin area assignments and attributes. To update - adding facilities, correcting assignments, or updating attributes - run another import with the appropriate integration mode.
To delete all facilities in a registry, open that registry’s card and click Delete facilities. This removes only the facilities in that registry; admin areas that are still referenced by the other registry are preserved. Only global administrators can delete facilities.
HFA facility sampling weights
Section titled “HFA facility sampling weights”For HFA analyses that require weighted estimates, you can upload per-facility sampling weights. Open the Data section and click the Sampling weights card to open the weights manager. Only global administrators can import or delete weights; all users with data access can view the weights table and download the current weights as a CSV.
Prepare a CSV file with a facility ID column and a weight column. Each import covers one time point. To upload weights, select or upload your CSV, then map the facility ID column, the weight column, and the target time point. A blank weight cell means the facility is not in that round’s sample and will be skipped. A successful import reports how many weights were imported, how many blank cells were skipped, and which time point was covered. Re-importing updates existing weights for the same facility and time point.
The weights manager displays a coverage summary showing, for each time point, how many facilities with data have a corresponding weight. A warning highlight indicates time points where some facilities have data but no weight - those facilities will count with weight 1 when weighted analysis is enabled.
If no sampling weights have been imported yet, the weights manager shows a message indicating that no weights are available, rather than an error.
To remove all sampling weights, click Delete all weights. This does not affect any facility records or HFA data.
GeoJSON for maps
Section titled “GeoJSON for maps”Map visualizations require geographic boundary data in GeoJSON format. FASTR maintains separate GeoJSON maps for the HMIS registry and the HFA registry. Upload one GeoJSON file per admin area level for each registry — typically for Admin Area 2 (regions) and Admin Area 3 (districts). Open the GeoJSON maps card for the relevant registry from the Data page.
Each GeoJSON file should contain polygons with a property matching admin area names in your structure data. FASTR attempts to match features to admin areas during upload and reports any mismatches. Unmatched areas appear blank on maps. Features without geometry are automatically skipped during both analysis and upload.
When you delete a GeoJSON level, the map cache for that level is automatically cleared so that stale boundary data no longer appears in map visualizations.
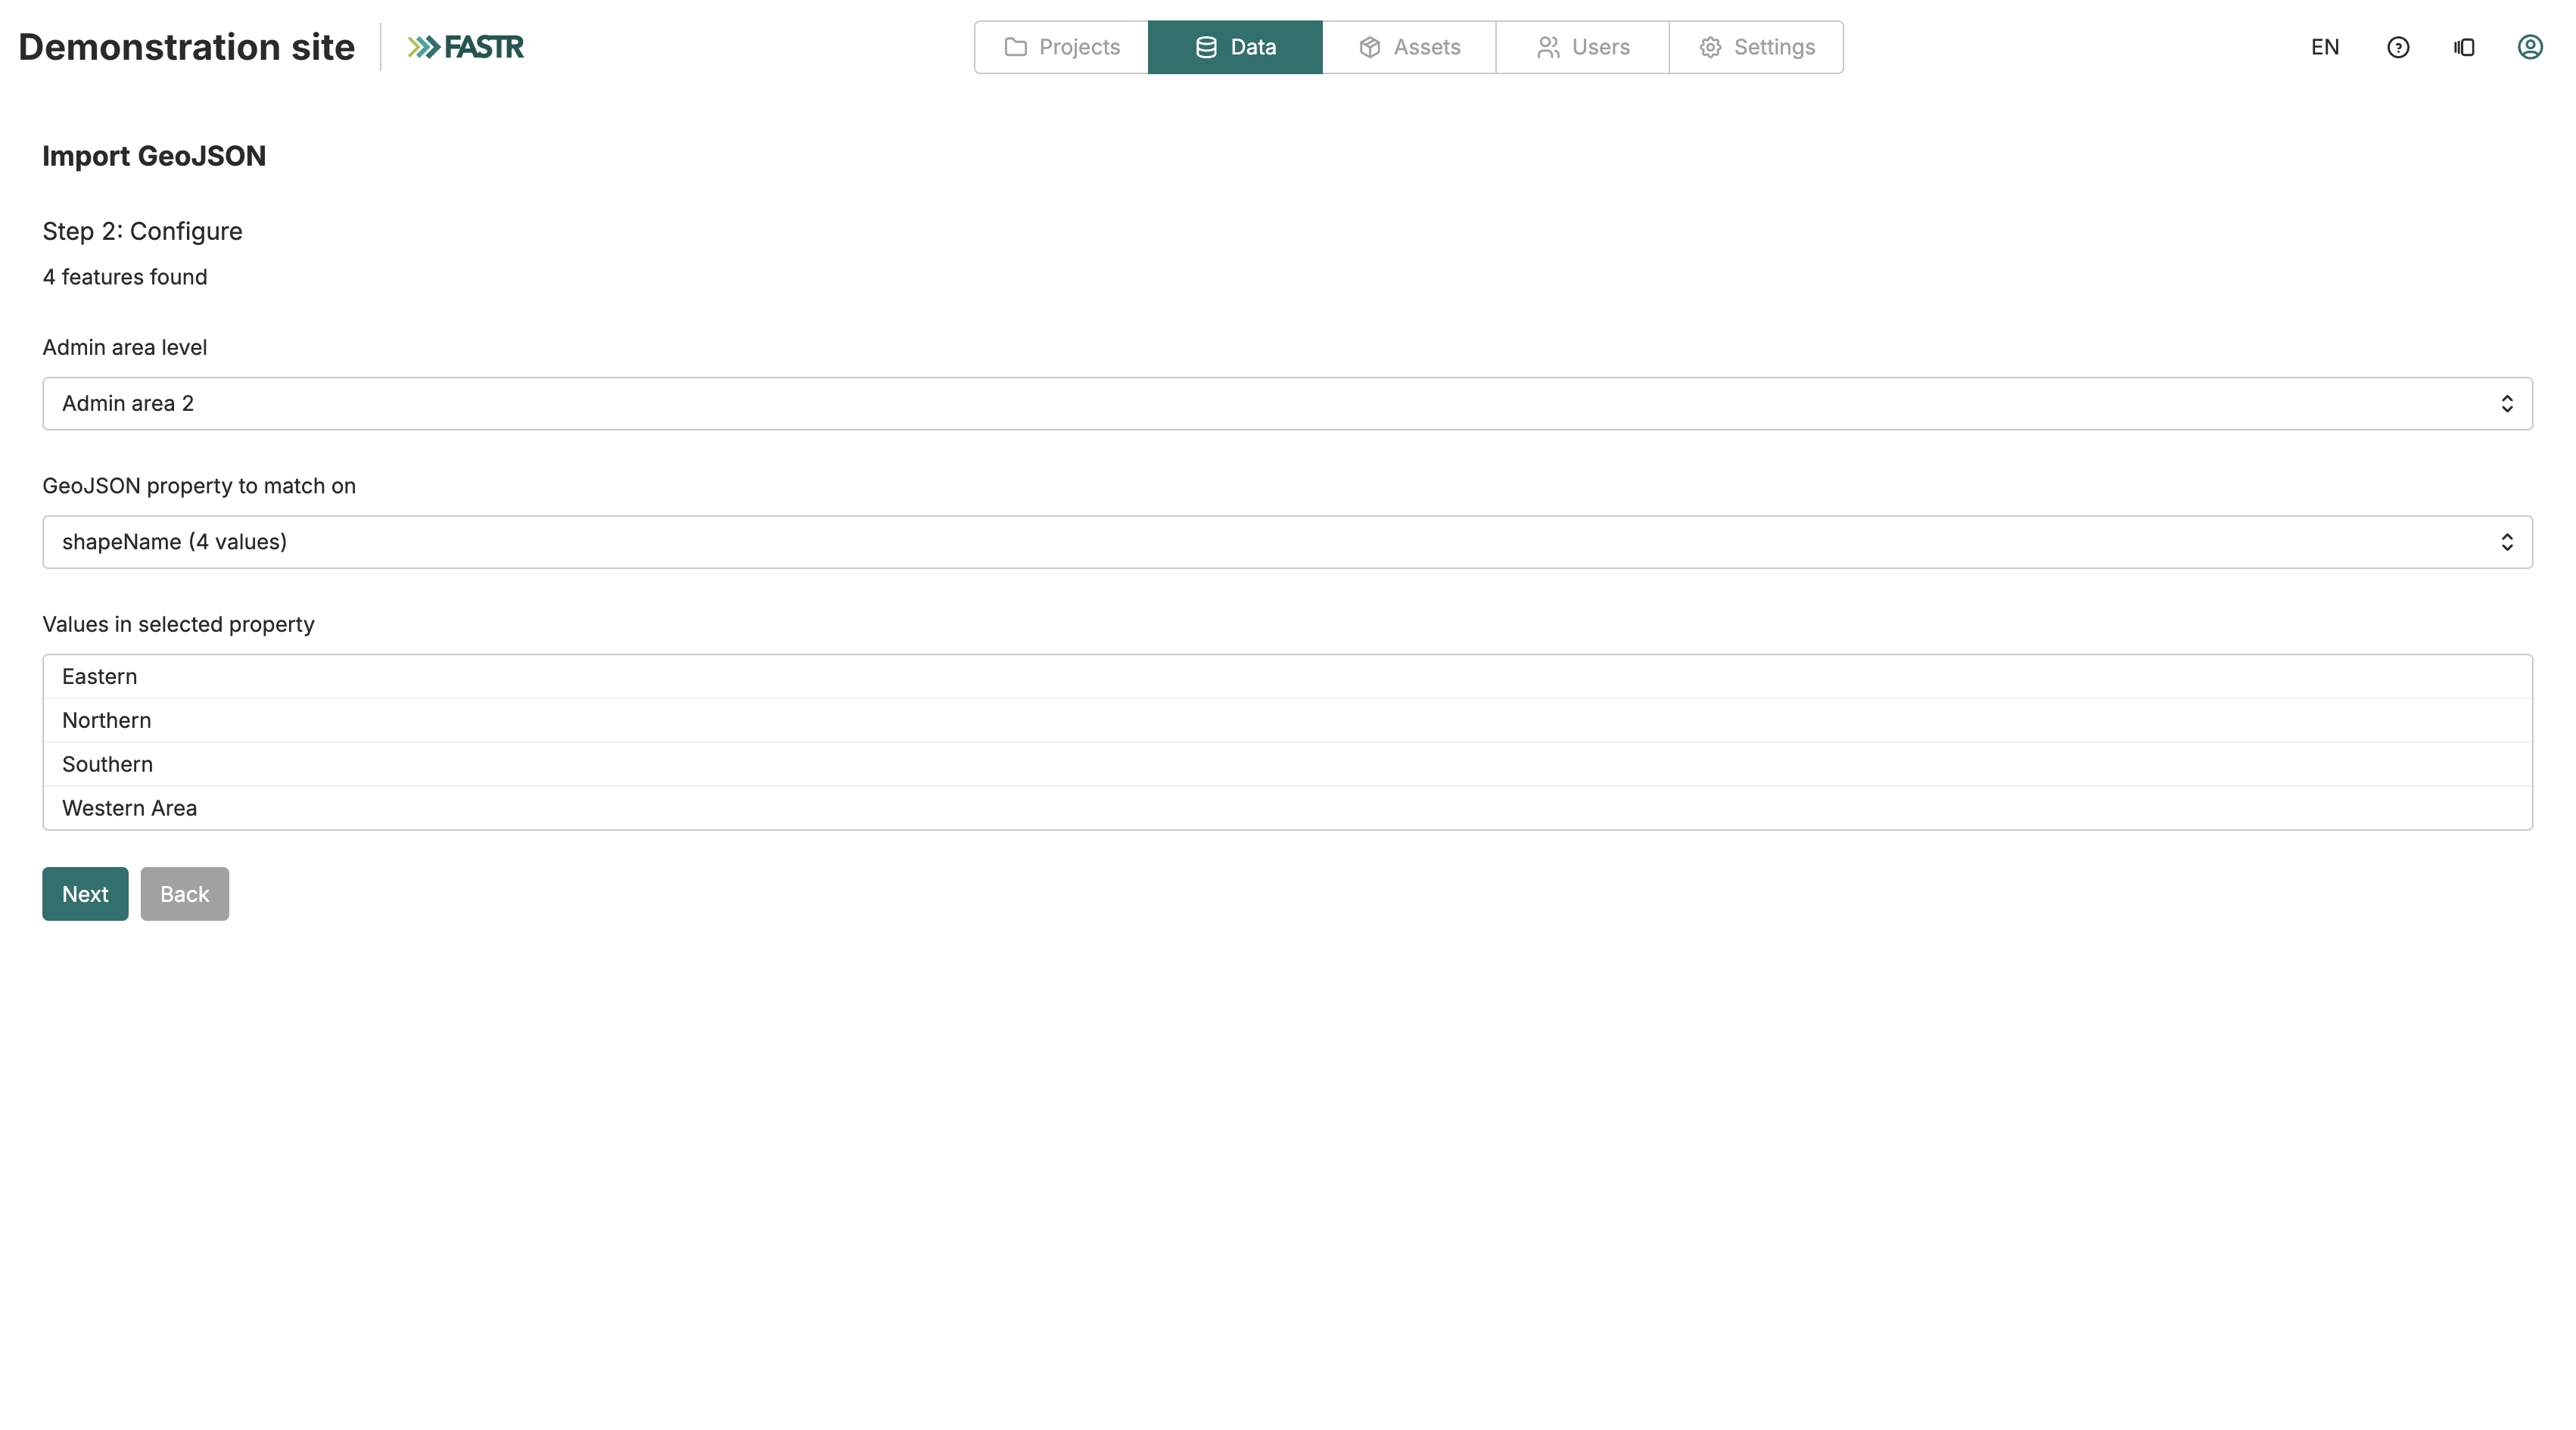
If naming differs between your GeoJSON and structure data, the GeoJSON editor lets you modify feature properties to resolve matching issues. You can also explicitly unmap a feature by setting its area ID to empty — this removes a previously matched feature from map visualizations without needing to re-upload the file.
Unmapped features in the upload wizard are kept in the file and can be mapped later using the GeoJSON editor.
Uploading a DHIS2 GeoJSON map
Section titled “Uploading a DHIS2 GeoJSON map”If your boundaries are stored in DHIS2, the GeoJSON upload wizard also accepts a DHIS2 connection. The wizard checks whether a stored DHIS2 connection exists for the instance and uses it by default. If you need to connect to a different DHIS2 server for this map, you can enter alternative connection details — they are used only for this session and are not saved as the instance’s stored connection. After selecting your DHIS2 server and level, FASTR fetches lightweight org-unit metadata (names and codes) to let you build the mapping without downloading the full polygon dataset. The full geometry is only downloaded when you confirm and save, which can take up to several minutes for large countries.
After saving, FASTR reports how many boundaries were stored, how many matched an admin area, and how many were left unmatched (shown as a warning count). Unmatched boundaries can be mapped later using Edit mappings.
If the match property you selected is not present on the DHIS2 GeoJSON features, FASTR rejects the save and shows an error rather than storing an empty map.